
Understanding How Improper Installation Damages Bearings
Introduction
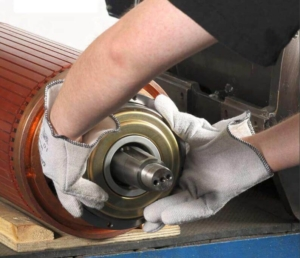
Improper bearing installation accounts for nearly 16% of all premature bearing failures. Whether you are dealing with a standard ball bearing or a complex tapered wheel bearing assembly, the damage often starts the moment the bearing is mounted.
In this guide, we will examine exactly how improper installation damages bearings, identify the visual signs of failure (such as scoring and brinelling), and outline the correct procedures to prevent these issues from happening again.
How Improper Installation Damages Bearings
Improper mounting techniques do more than just scratch the surface; they compromise the internal geometry of the bearing assembly. Depending on the severity of the error, the consequences typically fall into two categories: immediate failures detectable during testing, and latent defects that emerge only after operation begins.
Immediate Failure: Detectable During Run-In
Latent Defects: The Real Danger to Longevity
A far more concerning scenario occurs when installation damage is microscopic or subtle. Small indentations on the raceways or slight cage deformation often pass standard vibration tests without raising any alarms.
However, once the equipment is under load in the field, these latent defects act as stress risers. Over time, they accelerate material fatigue, leading to premature spalling and flaking long before the bearing reaches its calculated service life (L10 life). This results in unplanned downtime and expensive field repairs, damaging both the equipment’s reliability and the manufacturer’s reputation.
Case Study: Diagnosing Improperly Installed Tapered Wheel Bearings
A common scenario for technicians involves inspecting a tapered wheel bearing assembly and discovering it was improperly installed. Understanding the specific physical evidence of this error is the first step in failure analysis.
Identifying the Damage
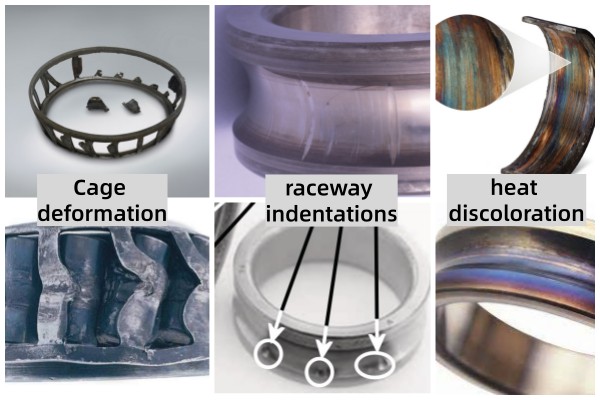
When a tapered roller bearing is forced into place incorrectly or subjected to improper preload, three distinct types of damage typically occur:
-
Cage Deformation: If installation force is applied to the wrong ring (e.g., pushing on the inner ring to seat the outer ring), the force transmits through the rollers. This often crushes or warps the cage, restricting roller movement.
-
Raceway Indentations (True Brinelling): Impact force from hammers or improper pressing results in permanent plastic deformation on the raceways. You will see distinct, evenly spaced dents corresponding to the roller spacing.
-
Heat Discoloration: If the bearing was installed with excessive preload (too tight), friction increases rapidly. This manifests as blue or brown discoloration on the rollers and raceways due to overheating.
Correct Procedure to Prevent Recurrence
To prevent these failures, adherence to the correct mounting procedure is mandatory. The “Golden Rule” of bearing installation is to never transmit mounting force through the rolling elements.
-
Verify Fits and Surfaces: Before installation, inspect the shaft and housing for burrs or nicks. A clean, smooth surface ensures the bearing seats correctly without excessive force.
-
Apply Force Correctly: When mounting a ring with an interference fit, apply pressure only to the face of that specific ring. For a tight inner ring fit, press the inner ring face; for a tight outer ring fit, press the housing.
-
Set Proper End-Play: For tapered wheel bearings, achieving the correct end-play (clearance) is critical. Use a dial indicator to measure axial play according to OEM specifications. Over-tightening leads to burnout; under-tightening causes excessive vibration.
Key Factors Causing Bearing Installation Damage
Most installation damage stems from three primary factors: contamination, improper force transmission, and misalignment.
Contamination
Bearings operate on an elastohydrodynamic lubrication (EHL) film that is often less than 1 micron thick—thinner than 1/50th of a human hair.
-
The Risk: Dust particles, textile fibers, or dirty grease are often larger than this oil film. If contamination enters the bearing during installation, it bridges the gap between the rolling element and the raceway.
-
The Result: The rolling elements crush these particles into the raceways, creating permanent indentations. These dents ruin the super-finished surface, disrupting lubrication and acting as stress risers for early fatigue failure.
Pro Tip: Keep bearings in their original packaging until the moment of installation. Ensure the shaft, housing, and tools are clinically clean.
Improper Force Transmission (True Brinelling)
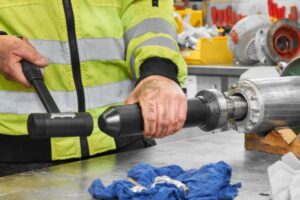
The most common error in mounting is transmitting force through the rolling elements. This occurs when the mounting force is applied to the wrong ring—for example, striking the outer ring to drive a bearing onto a shaft with a tight inner ring fit.
-
The Physics: The impact load travels through the balls or rollers, driving them into the raceways like a wedge.
-
The Consequence: This causes permanent plastic deformation known as True Brinelling. These indentations create immediate noise and vibration.
Recommended Read: It is crucial to distinguish these installation marks from vibration damage that occurs during shipping. For a detailed comparison, read our guide on [True vs. False Brinelling: How to Tell the Difference].
Misalignment
Forcing a bearing onto a bent shaft or into a housing that is not perpendicular results in misalignment.
-
The Result: This forces the rolling elements to run on the edge of the raceway (Edge Loading). The resulting stress concentration generates excessive heat and can fracture the bearing cage, leading to catastrophic seizure.
Diagnosing Installation Damage: Telltale Signs
When a bearing fails prematurely, the damage pattern on the raceways acts as a “black box” recorder. By disassembling the bearing and inspecting the surfaces, you can distinguish between operational wear and installation errors. Look for these two distinct patterns.
Equally Spaced Indentations (The “Washboard” Effect)
Target: Ball Bearings & Tapered Roller Bearings
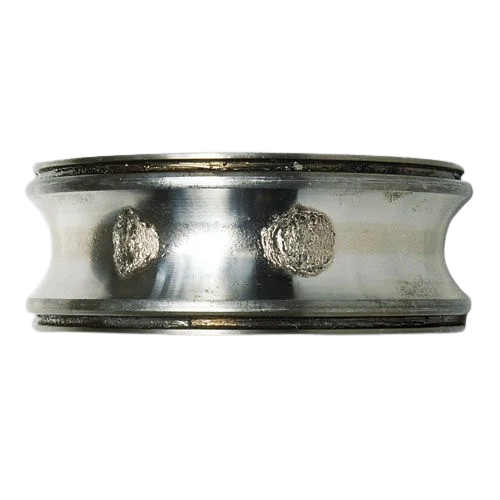
If you find spalling or deep marks on the raceway that perfectly match the distance between the rolling elements, the cause is almost certainly static impact load during installation.
-
The Mechanism: Because the bearing was not rotating when the damage occurred (static), the balls or rollers were driven into the raceway at specific points.
-
Visual Identifier: Unlike normal fatigue which spreads randomly, these marks appear at fixed intervals (equal pitch). This indicates that the damage originated from a hammer blow or excessive press force applied through the rolling elements before the machine ever turned.
Axial Scratches and Scoring
Target: Cylindrical Roller Bearings & Needles
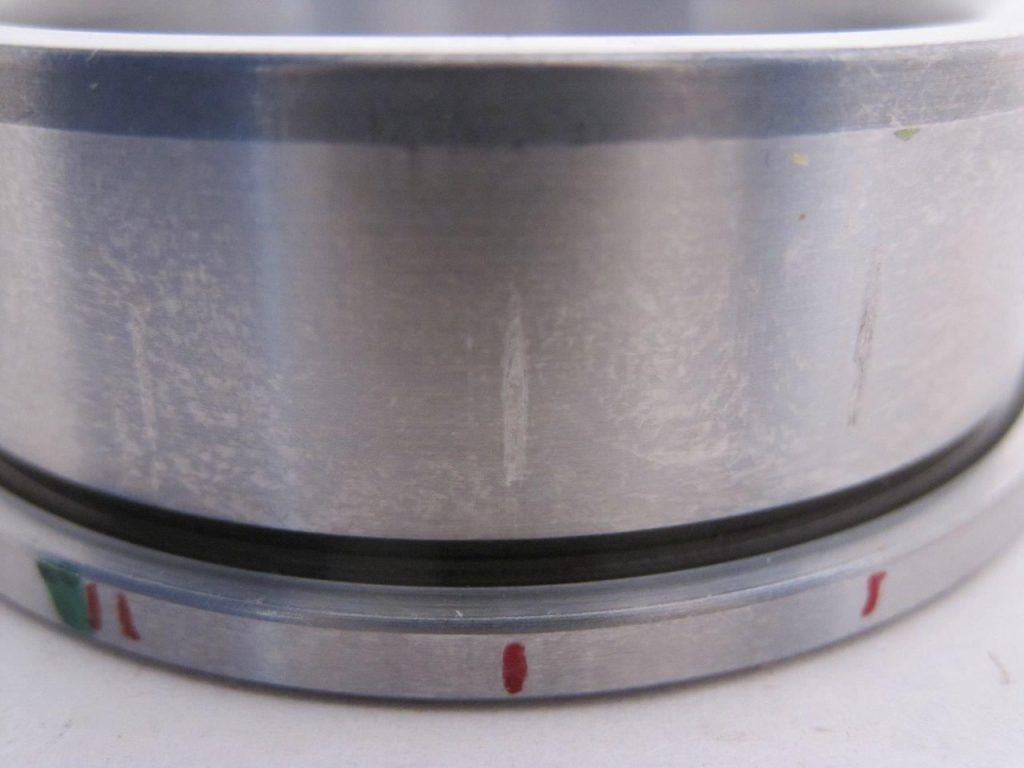
This is a common issue with separable bearings, where the inner ring is mounted on the shaft and the outer ring is in the housing. During the final assembly (often a “blind” assembly), if the shaft is slightly tilted or forced, the rollers will scrape across the raceway.
-
Visual Identifier: Look for axial marks (lines running parallel to the shaft) or triangular “smears” on the raceways.
-
The Consequence: These scratches, known as scoring, break the surface finish. Once operation begins, these rough spots create stress raisers that quickly lead to noise and surface peeling.
Correct Procedure: A Prevention Checklist
Preventing installation damage requires a shift from “force” to “precision.” Implementing these standard operating procedures (SOPs) will significantly reduce early failure rates.
Use the Right Tools (No Direct Hammers)
Never strike a bearing directly with a steel hammer. The point impact inevitably causes brinelling.
-
Cold Mounting: For smaller bearings (under 4 inches/100mm), use a fitting tool kit (impact sleeve) that applies force simultaneously to both the inner and outer rings. This prevents force transmission through the rolling elements.
-
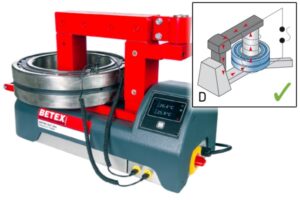
Hot Mounting: For larger interference fits, use an induction heater. Heating the bearing expands the inner ring, allowing it to slide onto the shaft without any mechanical force. Avoid open flames, which alter the steel’s metallurgy.
Precision Lubrication
Grease is not just a filler; it is a component.
-
Fill Quantity: Avoid “packing” the bearing full. Over-greasing causes churning, which generates excessive heat. For most applications, filling 30% to 50% of the free space inside the bearing is optimal.
-
Cleanliness: Ensure the grease fitting and nozzle are wiped clean before application to prevent pumping dirt directly into the race.
Validate the Fits
Before mounting, measure the shaft and housing with a micrometer. An oversized shaft will reduce the bearing’s internal clearance (radial play) once mounted, leading to overheating. A worn undersized housing will allow the outer ring to spin, causing fretting corrosion.
Final Thoughts: Why Installation Matters
Premature bearing failure is rarely a manufacturing defect; more often, it is a symptom of improper handling. Whether it is a microscopic dust particle or a single hammer blow, the damage done during installation sets the clock on the bearing’s lifespan.
By identifying the signs of installation damage—such as true brinelling, cage deformation, and scoring—you can correct your procedures and stop replacing parts unnecessarily.
Need Technical Support? If you are unsure about the cause of a failure or need guidance on selecting the right bearing for your specific load conditions, our engineering team is here to help.
[Browse TFL’s Bearing Catalog] or [Contact Us] today for expert advice and high-performance solutions.